Manual scanned and put online free of charge by Mike Butkus, whose library runs on donations. The link opens his model page, where you can download the PDF.
Getting started
Loading In the shade, press button (d) under the body: the back opens. Pull the rewind knob (e) all the way out, put the cartridge in its chamber, then push the knob back in while turning it slightly. Turn the take-up spool (f) until its light-coloured slot is at the top and push the film leader into it, lower edge against the bottom flange, until a perforation catches on the small pin.
Closing the back Turn the spool until the teeth of the sprocket (g) engage the perforations on both sides, then press the back against the body until it clicks. Turn the rewind knob in the direction of the arrow until you feel slight resistance: the film is taut in the cartridge. Set the film indicator to the type loaded: black and white, daylight colour or artificial light colour.
Settings Turn ring (a) to bring the red mark to the shutter speed: 1/60 or 1/125 s in full daylight, 1/250 s for a fast-moving subject. Set the aperture with lever (j) against index (b), then the distance with ring (k): the close-up, group or landscape symbol opposite the triangle.
Your first photo With your right thumb, push the rapid advance lever (m) in a single movement as far as it goes, then let it return: it cocks the shutter and advances the film. Frame within the bright-line frame of the viewfinder, with your eye close to the eyepiece and no finger or strap in front of the lens. Press the shutter button (l) all the way down, slowly, squeezing gently.
Rewinding If the lever locks once the photo has been taken, you’ve reached the end of the film: don’t force it. The start of the instructions is missing from the scan. What remains says to watch the black dot on the release button, then give a few more turns to wind all the film back into the cartridge. In the shade, open the back, pull out the rewind knob and take out the cartridge.
What it can do
Four shutter speeds, 1/30, 1/60, 1/125 and 1/250 s, plus B for an exposure as long as you like. Don’t set the speed between two values. The aperture, on the other hand, can be set between two click stops.
Three quick focus settings by symbol: close-up, group, landscape. You can also set the exact distance on the scale: black figures in metres, red in feet.
A depth-of-field scale (q) surrounds the focusing mark. Example from the manual: at f/11 on “group”, everything is sharp from about 6 feet to infinity.
Self-timer of about 10 s: wind on first, push the red lever (p) all the way clockwise, then press the shutter button. Once it’s set, the next shot can only be taken with the self-timer. It also works with flash.
For B exposures, the manual recommends a cable release, which screws into the shutter button. There is a tripod socket under the body.
The flash
A cordless flash with a centre contact slides into the shoe (n) on the top cover. A flash with a cord also slides into the shoe, and its cord plugs into the socket (o).
With flashbulbs, 1/30 s only: red mark of the ring on 30. With an electronic flash, all speeds up to 1/250 s.
For the aperture, divide the guide number by the distance between the flash and the subject. Example from the manual: guide number 110, subject at 10 feet, which gives f/11.
Good to know
Between 3.3 and 8 feet (about 1 to 2.4 m), the viewfinder doesn’t show exactly what will be in the photo. At 3.3 feet, keep the subject below the imaginary line joining the two marks at the top of the frame. This line moves up with distance and meets the frame at 8 feet.
The manual gives an exposure table for full daylight. Its corrections: open up one stop at 1/125 s, two at 1/250 s, one stop for a side-lit subject, two for a backlit close-up. Close down one stop in sunshine on sand or snow.
Lever locked: either the photo hasn’t been taken, or the film has run out. If the counter wasn’t set, or was set wrongly, the lever may resist before the counter shows 1: that’s the end of the film, rewind without forcing.
Filters screw onto the lens: 32 mm diameter.
The manual doesn’t mention any battery.
Care
Protect it from dust, dirt and knocks. Blow dust out of the inside with a rubber blower bulb.
Lens: first brush or blow off any grit, then wipe gently with lens tissue, moistened with lens cleaning fluid if needed.
Never oil the shutter or any other part, and never take apart anything in the shutter, lens or body.
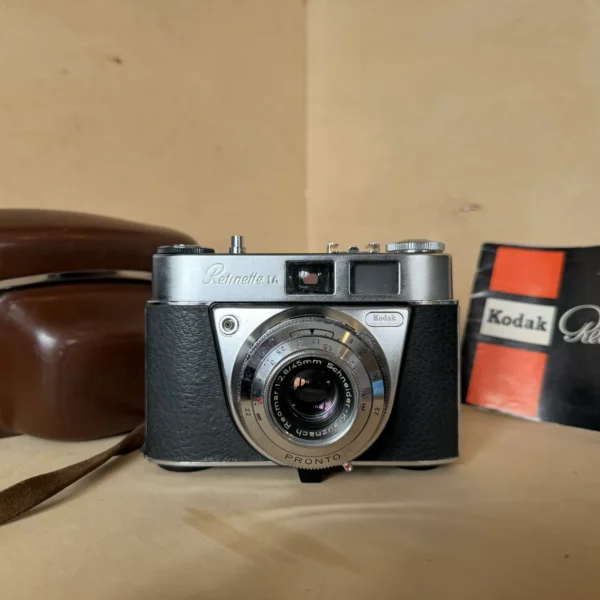
Retinette IA specifications
Format
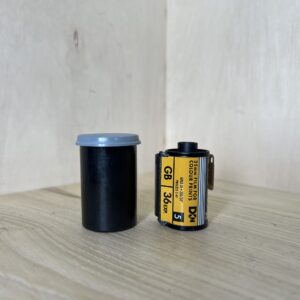
135 film in 20- or 36-exposure cartridges, 24 × 36 mm frames
Lens
Schneider Reomar 45 mm f/2.8, apertures from f/2.8 to f/22
Shutter
Prontor 250 S, 1/30, 1/60, 1/125 and 1/250 s and B, cocked by the advance lever
Focusing
manual, by zones (close-up, group, landscape) or on the distance scale, from 3.3 feet (about 1 m) to infinity
Viewfinder
projected bright-line frame, parallax marks
Exposure
shutter speed and aperture set by hand, exposure table for full daylight in the manual
Flash
shoe with centre contact and socket for a cord, F and M bulbs at 1/30 s, electronic flash at all speeds
Self-timer
about 10 s
Film advance
rapid lever, a single stroke advances the film and cocks the shutter, double-exposure prevention
Construction
cast aluminium alloy body, black covering, chrome top cover, tripod socket under the body
€25.00Original price was: €25.00.€21.50Current price is: €21.50.
Secure payment
Pay by card, Klarna or Google Pay. Your bank details never pass through us.
Free delivery from €150 in mainland France
Elsewhere, the exact rate is shown before you pay.
Tracked parcels, padded by hand
Tracking number by email, oversized packaging: a camera body doesn’t travel like a book.
Tested second-hand
Mechanics, optics, electronics: every item goes through our testing method before it goes online.
A word about cookies
Those for the basket and payment are essential. The others wait for your consent: audience measurement, advertising, visit tracking for our emails. You can withdraw it whenever you like. Details here.