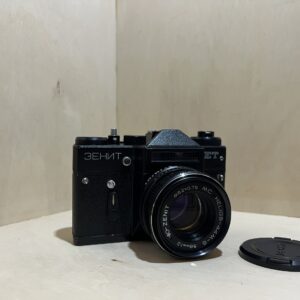




Zenit 12XP: manual and user guide
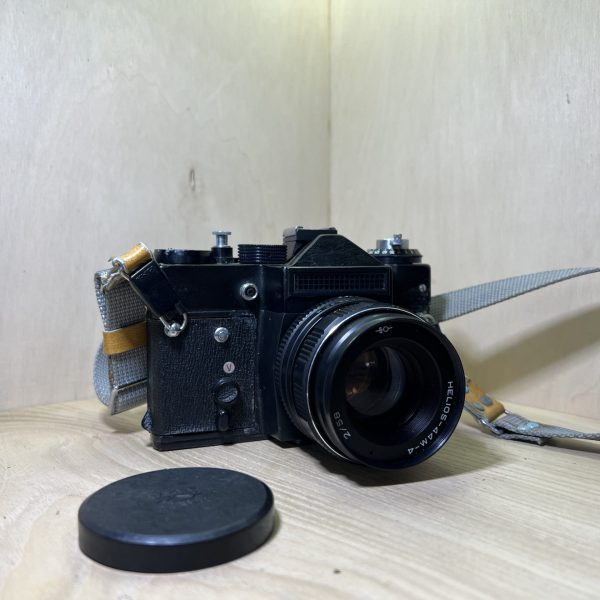
The M42 screw-mount Zenit SLR, with an LED light meter. Its original manual, then the essentials for using it.
View the manual on butkus.orgOriginal scanned manual · 27 pages · in German
Manual scanned and put online free of charge by Mike Butkus, whose library runs on donations. The link opens his model page, where you can download the PDF.
Getting started
- Batteries Turn the slotted battery compartment cover anticlockwise until the slot is horizontal, and remove it. Insert two batteries, + sign facing outwards, put the cover back and turn it a quarter turn the other way: the slot is vertical. With your eye to the viewfinder, press the shutter button until you feel resistance: if one or both LEDs light up, the light meter is powered.
- Loading In the shade, unfold the crank and pull the rewind knob up as far as it goes: the back opens. Put the cartridge in, push the knob back down, turning it slightly if needed, slide the film leader into the slot of the take-up spool, with a sprocket tooth in the perforations, then close the back, pressing until the latch clicks. Wind on and fire twice, bringing the counter’s 0 opposite the mark by its tab before the second release.
- Sensitivity Turn the film speed ring, under the rewind crank, until your film’s value is opposite the mark: it moves in clicks. The figures run from ISO 25 to 400, and the lines between them give the intermediate values, from ISO 16 to 640. A wrong value gives a badly exposed photo.
- Your first photo Focus with the ring: the image should be sharp, with no shimmering, in the central microprisms. With your eye to the viewfinder, press the shutter button until you feel resistance and turn the aperture ring or the shutter speed dial until both LEDs blink together. Wind on as far as it goes, then press all the way in one smooth movement: a sharp press shakes the camera.
- Rewinding When the counter shows 36, release the shutter, then push the rewind button on the top plate all the way in. Unfold the crank and turn it in the direction of the arrow, steadily and without rushing, until the film leaves the take-up spool: too fast, and static electricity leaves marks on the film. Pull the rewind knob up, open the back and take out the cartridge.
What it can do
- The light meter reads through the lens, so it also works with a filter, a close-up lens, an extension ring or another lens. Two LEDs, on the right in the viewfinder, guide the setting.
- Shutter speeds from 1/30 s to 1/500 s plus Bulb: the shutter stays open as long as you press. For a long exposure on a tripod, press the shutter button and turn it anticlockwise as far as it goes (T), then bring it back to the middle and let go to close. A cable release screws into the button.
- A self-timer of at least 7 s. On a tripod, set focus and exposure, press the shutter button until you feel resistance and turn it clockwise (V): with the self-timer, the aperture doesn’t close by itself. Wind on, push the self-timer lever down as far as it goes, press its button, then return the shutter button to its starting position.
- In the centre of the viewfinder, microprisms surrounded by a ground-glass ring. The ring is mainly useful for macro, microscope work or small apertures, when the microprisms lose their precision.
- The depth-of-field scale gives the sharp zone: at f/8, focused at 3 m, sharp from 2.3 to 4.5 m. Pressing until you feel resistance stops down the aperture and shows you this zone in the ground-glass ring.
Which lenses?
- M42 × 1 screw mount, 45.5 mm flange distance: it takes lenses with this thread and this flange distance.
- Standard lens: Helios-44M-4 or MC Helios-44M-4, 58 mm f/2. Its aperture stays open for viewing and closes to the chosen value when the shutter fires. MC means multi-coating: less flare against the light, more faithful colours.
- Without an automatic aperture, you set the aperture by hand. With a long telephoto lens, the left and right edges of the image may be slightly masked.
- For copy work and macro, extension rings go between the body and the lens. Use rings with an actuating pin with a lens that has no manual aperture switch, like the Helios-44M-4, and rings without a pin with a lens set to M.
- The manual lists eleven M42-mount lenses, from the Mir-10A 28 mm f/3.5 to the MC MTO-1000 AM 1000 mm f/10.
The flash
- The shutter has X sync for electronic flash: set 1/30 s, marked “30-X” in red.
- A flash with a sync cord plugs into the socket on the front of the body. A flash designed to connect without a cord slides into the centre-contact hot shoe, once its cover is removed.
- Choose the aperture according to your flash’s manual.
Good to know
- Top LED lit: too much light. Bottom LED: not enough. If they never blink together and the lit LED switches between two neighbouring values, either one will do.
- Don’t turn the speed dial between 500 and B, or when the shutter button is locked on T, or while the self-timer is running.
- Always wind on as far as it goes, but don’t leave the camera cocked for long: it can harm the shutter.
- If the rewind button resists, press the shutter button until you feel resistance and turn it to V. Put it back after rewinding.
- In very cold weather, keep it under your coat between shots. When you bring it in from the cold into a warm room, leave it in its closed case for a while to avoid condensation.
12XP specifications
- Format
- perforated 35 mm film in cartridges, 24 × 36 mm frames, 36 exposures
- Mount
- M42 × 1 screw, 45.5 mm flange distance
- Lens
- Helios-44M-4 or MC Helios-44M-4, 58 mm f/2, automatic aperture from f/2 to f/16, focus from 0.5 m to infinity, M52 × 0.75 screw-in filters
- Shutter
- from 1/30 s to 1/500 s, Bulb and long T exposure
- Viewfinder
- SLR with instant-return mirror, microprisms and ground-glass ring, 20 × 28 mm field, 4.3× eyepiece
- Metering
- through the lens (TTL), two LEDs in the viewfinder
- Sensitivity
- ISO 16 to 640 (GOST), DIN 13 to 29
- Flash
- X sync at 1/30 s, front socket for a sync cord, centre-contact hot shoe
- Power
- two 1.5 V batteries (Mallory D386, Seiko SB-B8, СЦ-32 or similar), for the light meter
- Dimensions and weight
- 136 × 98 × 97 mm without case, 0.95 kg
In the shop
The Zenit 12XP in the workshop
Filter
Showing the single result
Goes well with
Complete your kit
Accessories in stock that travel in the same parcel.
In the same category
The same kind of camera, available
More items from the same category, tested and checked in our workshop.