


Fujica AX Multi Program: manual and user guide
The X-mount Fujica SLR with three programs. Its original manual, then the essentials for using it.
Manual scanned and put online free of charge by Mike Butkus, whose library runs on donations. The link opens his model page, where you can download the PDF.
Getting started
- Battery Push the battery cover latch towards the lens with your fingernail and lift the cover. Slide in a new 6 V battery (4SR44 silver oxide, 4LR44 alkaline or 2CR-1/3N lithium), negative (–) end first, following the polarities shown in the compartment. With the main switch on, press the shutter button halfway: if you hear “beep, beep”, change the battery straight away.
- Loading Pull the rewind crank up: the back opens. Put in the cartridge, push the crank back down, slide the film leader into a slot in the take-up spool, wind on once or twice, checking that the perforations catch on the teeth, then take up the slack with the crank in the direction of the arrow and close the back. Wind on and fire until the white dot between the red 0 and the 2 is opposite the white index.
- Sensitivity Nothing to set: with DX-coded film from ISO 50 to 1600, the camera reads the film speed by itself. Film without a DX code is counted as ISO 100. The window on the back shows the film type, its number of exposures and its speed.
- Your first photo Press the locking pin and set the diamond on the aperture ring to its mark: without this, there’s no automatic exposure. Set the selector to P, focus until the two halves of the image line up in the centre, then fire. At halfway, a red LED lights up next to the chosen program.
- Rewinding At the end of the roll, don’t force the lever if it resists: bring it back into place. Press the rewind button, then turn the crank in the direction of the arrow until the counter returns to S and the crank suddenly becomes light. Then pull the crank all the way up to open the back.
What it can do
- Three programs: P sets the aperture and shutter speed together, HP opens up as wide as possible for a fast shutter speed (sport, moving subjects), DP stops down as far as possible for a large depth of field.
- The electronic shutter runs from 1/2 s to 1/1000 s, chosen by the camera. Off the diamond, you set the aperture and the shutter speed stays at 1/60 s.
- Exposure compensation: press the dial lock and turn the dial to the right to overexpose, to the left to underexpose. The manual recommends +1 or +2 for a backlit portrait, +1 for snow or a big sky, -1 or -2 for a spotlit subject against a dark background.
- Self-timer of about 10 s: main switch on SELF, then press the shutter button. It beeps for 7 s, then gives a long 3 s beep, and the shutter fires. Move the switch off SELF to cancel.
- Multiple exposures: after the first shot, keep the rewind button pressed while you operate the lever. The film doesn’t move and the counter stays put. For two shots on the same frame, the manual recommends compensation at -1, for four at -2.
Good to know
- In the viewfinder, an LED blinking twice per second signals a slow shutter speed: hold the camera steady. At 8 times per second, the photo will be overexposed or underexposed: flash or ND filter. If it lights up then goes out, the diamond isn’t on its mark.
- Cold weakens the battery: below 0 °C, put in a new battery and keep a second one warm in your pocket. If no beep sounds during the test, the battery may also be completely flat.
- During the blank shots while loading, leave the cap on the lens.
- Don’t operate the lever after pressing the rewind button: the button may pop back out.
- If you’re not using it for a while, fire the shutter to release it, take out the battery and store the camera somewhere dry, away from heat and dust.
Which lenses?
- Fujica X bayonet mount, 65° turn.
- Only Fuji DM lenses in X mount, marked “DM” and bearing the auto diamond, can be used on this body.
- To mount a lens, line up its red mark with the red dot on the body, push in and turn to the right until it clicks. To remove it, press the lens lock and turn to the left.
- The small red dot near the index mark is for infrared: focus normally, then move the distance you found opposite this dot.
The flash
- Move the aperture ring off the diamond and set the aperture you want: the shutter speed switches to 1/60 s by itself.
- The hot shoe has a direct contact. With a flash other than Fuji’s, work out the aperture yourself.
- With the Fuji Auto Strobo 300X, set the aperture shown on the flash’s calculator dial. With the 200X, set f/4. With the AZ, divide the guide number 17 (ISO 100, metres) by the distance to the subject.
AX Multi Program specifications
- Format
- 135 film, 24 × 36 mm frames
- Mount
- Fujica X bayonet, X-Fujinon DM and X-Fujinar DM lenses
- Shutter
- horizontal-travel cloth focal-plane, electronically controlled, from 1/2 s to 1/1000 s, 1/60 s outside auto mode
- Focusing
- manual, central split image, microprism ring and ground glass
- Viewfinder
- pentaprism, 92% coverage, 0.86× magnification
- Metering
- through the lens, centre-weighted, from EV 2 to 18 (ISO 100, f/1.4), P, HP and DP programs
- Sensitivity
- automatic via DX code, from ISO 50 to 1600, ISO 100 without DX code
- Flash
- direct-contact hot shoe, 1/60 s with flash
- Power
- one 6 V battery: 4SR44, 4LR44 or 2CR-1/3N
- Dimensions and weight
- 135 × 87 × 54 mm, 460 g body only
In the shop
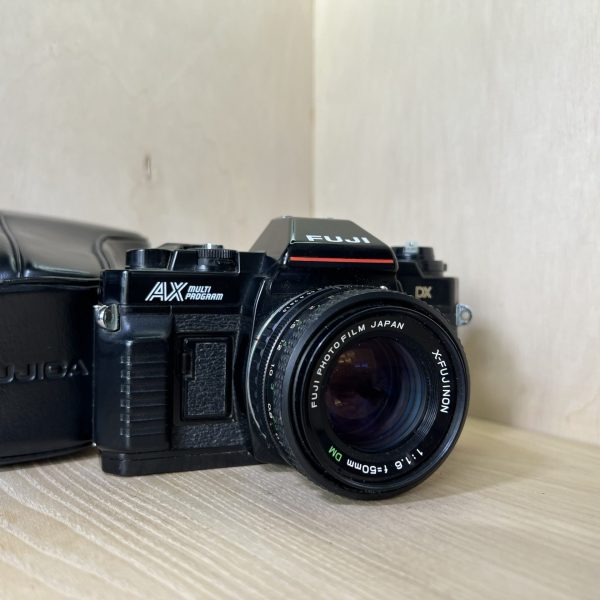
The Fujica AX Multi Program in the workshop
Filter
Showing the single result
Goes well with
Complete your kit
Accessories in stock that travel in the same parcel.
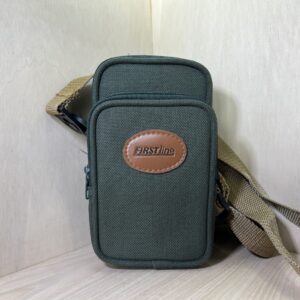
In the same category
The same kind of camera, available
More items from the same category, tested and checked in our workshop.